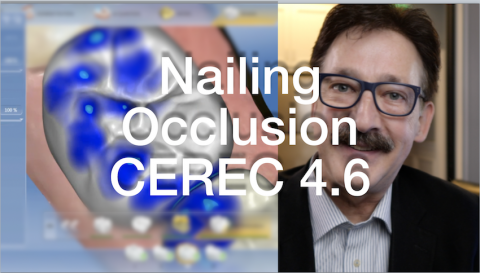
This video is about becoming a happy occlusal CAD/CAM clinician. There are five principles that I apply to achieve shimstock occlusion in CEREC 4.6. It is like clockwork. When you apply them, clinical theater life becomes much more pleasant.
Submitted by James Klim DDS, CADStar host on 10/16/2018 - 7:09am
Submitted by James Klim DDS, CADStar host on 10/07/2018 - 9:57pm
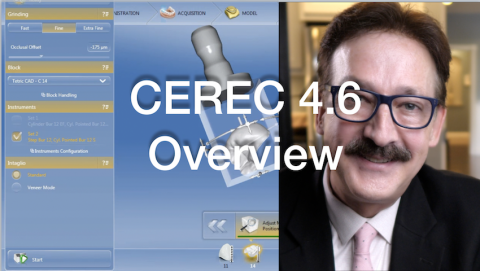
The CEREC 4.6 workflow is very similar to 4.52. The most significant upgrade from 4.52 is the camera scanning proficiency. The camera also picks up shiny surfaces such as ceramic and gold much better than in prior software versions. The model rendering is faster from the Acquisition screen and all the steps in the model screen are automated including setting Model Axis and Drawing Margins. I have found it is better to disable the auto margin calculation unless the margins are high and dry. For larger cases with multiple preparations, the software has a tendency to crash. The software performs much better when margin calculation is
Submitted by James Klim DDS, CADStar host on 09/30/2018 - 5:29pm
Categories:
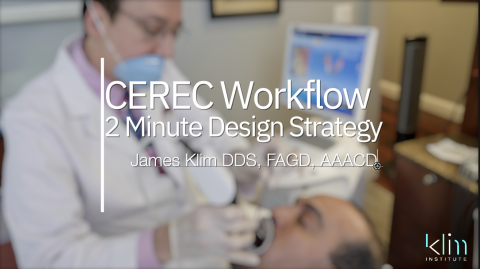
Part two video for optimizing your CEREC software clinical flow. This is a longer video than most of mine. However, I think it will keep your attention interest. This video reflects my CEREC software workflow for a two-minute design sequence for a posterior restoration. The workflow and design tips provided in this video have solved the design and fit issues for several dozen dentists who quit using or were planning on returning their CEREC due to integration and quality frustrations.
View Preview
Submitted by James Klim DDS, CADStar host on 09/16/2018 - 9:03pm
Categories:
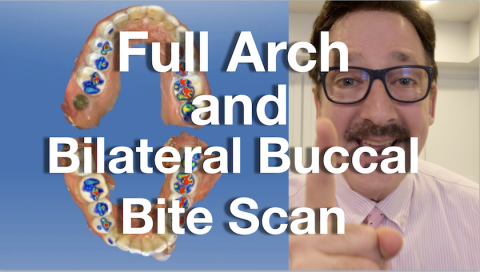
This video shows my full approach for taking upper and lower full arch scans and mounting them with a bilateral buccal scan. This has been the one Achilles heel with the chairside software until now. Now that we have auto-mounting in the Acquisition screen with the buccal scan, we can now get in both sides of the arch for a full seating of the models. Ninety percent of all impressions including study models are taken with the chairside software in my practice. Technique for the full arch scan is critical to make this approach work.
Submitted by James Klim DDS, CADStar host on 09/10/2018 - 9:28pm
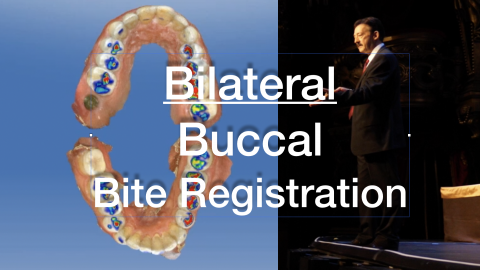
Due to conflicting schedules, I will not be able to make it to Dentsply Sirona World 2018. If I were there, one of my topics would be mounting a full upper and lower arch digital scan with a bilateral buccal scan in the chairside CEREC software. I use this approach often for appliance printed applications.
General Video Viewing
Submitted by James Klim DDS, CADStar host on 08/26/2018 - 9:50pm
Categories:
I have had a number of inquiries from our online world audience about where are the 4.6 software videos. 4.6 has not been released in the US yet. We will offer videos as soon as it is released in the US. In the meantime, be cautious about uploading until we are assured the bugs are worked out.
Link for Members Video
Submitted by James Klim DDS, CADStar host on 08/15/2018 - 1:09pm
Categories:
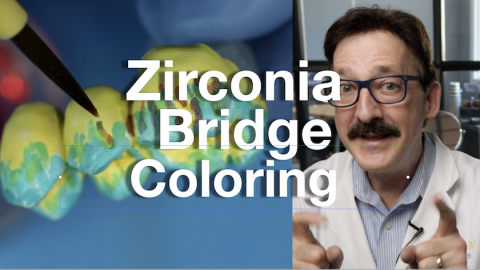
When the case demands a high strength zirconia material and the restoration is in the secondary smile zone (shadows of the smile), then I am thinking pre-sintering infiltration coloring. As of late, my preference is the ZirCAD LT Colouring Liquids. This video will show the steps and liquid color application technique I use for a premolar bridge. My primary coloring objectives for green zirconia is creating the saturation multi-effect and lowering the value in the cusp and occlusal zones. It rather simple to learn and master.
View Video Preview
Submitted by James Klim DDS, CADStar host on 08/14/2018 - 10:39am
Categories:
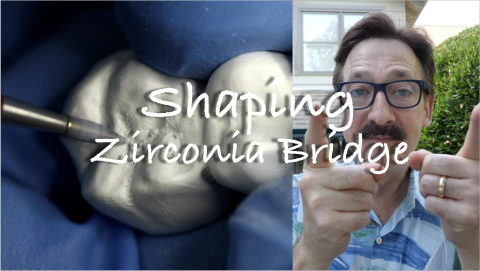
This video demonstrates a systematic walkthrough for shaping in the green zirconia bridge when preparing for coloring infiltration prior to sintering. For this case, ZirCAD LT high strength zirconia is used. Rather than speed firing, a 9-hour sintering cycle was used to optimize the translucency (Programat S1).
View Video Preview
View Full for Members
Submitted by James Klim DDS, CADStar host on 08/10/2018 - 9:47am
Categories:

Having used the Omnicam since its beginnings, taking a full arch impression is second nature. Using the Formlab 2 printer, we have found the Omnicam impression and model technique has provided a proficient appliance fabrication method that is accurate with almost no-adjustments needed chairside. We are at the beginning of the printing wave in dentistry. Omnicam scans and printing have become a seamless support method for appliances and records in our digital clinical theaters at the Klim practice.
View Video Preview
Submitted by James Klim DDS, CADStar host on 08/05/2018 - 10:11pm
Categories:
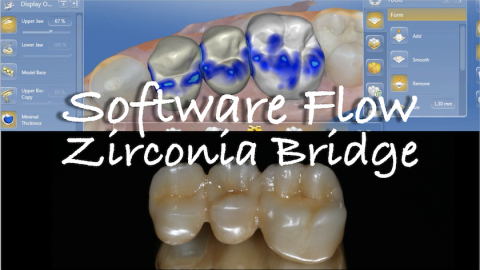
When I want a high strength posterior bridge material, I go with either the Sirona Zirconia or Ivoclar ZirCAD LT. This CEREC bridge software flow video is the first in the posterior zirconia bridge series, start to finish. High strength zirconia at this point in time is not the easiest to handle when it is not in the shadows of the mouth. In this case, ZirCAD LT Coloruing Liquids were used on the green zirconia surfaces before sintering. This is where most of the multi-coloring effect happens and then is lightly characterized after sintering with Ivocolor glaze and stains. Enjoy the series.