his video presents the steps in texturing for an upper canine zirconia restoration. The steps are similar to a ceramic restoration, except the applications are more exaggerated to account for Zirconia sintering shrinkage.
Submitted by James Klim DDS, CADStar host on 09/13/2024 - 12:04pm
Categories:
Submitted by James Klim DDS, CADStar host on 08/08/2024 - 9:02am
Categories:
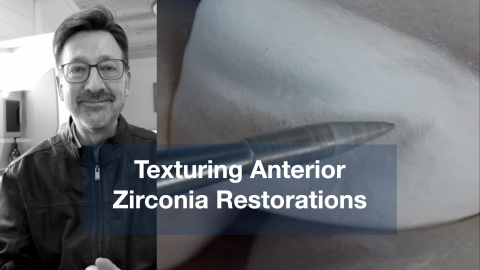
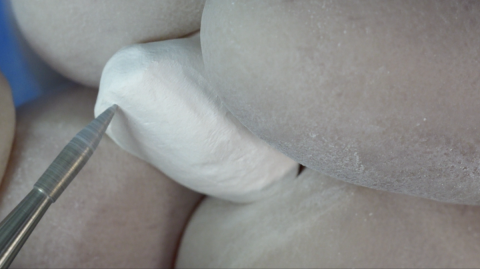
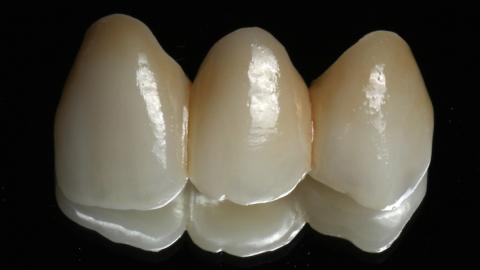
As zirconia has improved with translucency and multi-layered options, we now have options to achieve excellent anterior zirconia applications. This video presents the steps in texturing anterior Zirconia restorations.
Submitted by James Klim DDS, CADStar host on 07/09/2024 - 7:59pm
Categories:

This video will provide the steps and factors for choosing the shade for e.max. These principles apply to other brand ceramics and will assist you in understanding them and making ceramic blending steps.
Submitted by James Klim DDS, CADStar host on 07/07/2024 - 4:45pm
Categories:

Zirconia has taken our industry by storm. Over 50% of indirect restorations placed in the mouth are now zirconia. Along with this surge in our industry comes an assortment of many brands, strengths, and aesthetic options. This video will review my overview of choosing and blending zirconia restorations.
Submitted by James Klim DDS, CADStar host on 03/24/2024 - 7:02pm
Categories:
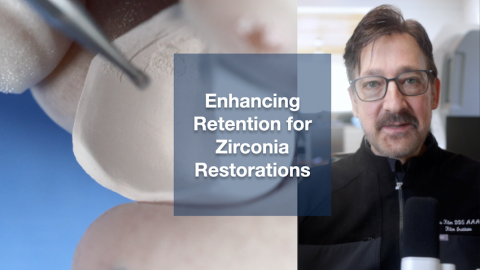
Are we able to increase the retention for zirconia restorations without bonding? The answer is yes. This video will document my last ten years of keeping zirconia restorations in place using glass ionomer cement. Clinically, I want to consider ways of removing crowns and bridges if and when they need upgrades due to subgingival caries. We all know how difficult it is to remove an e.max bonded full crown. Just think of how difficult it will be to remove a bonded zirconia crown if and when it needs removal. An Erbium-Yag laser will help, but not everyone has laser assistance for removing bonded restorations.
Submitted by James Klim DDS, CADStar host on 02/21/2024 - 8:59am
Categories:
MiYO 850 has been a game changer for my anterior e.max applications. This video will show the viewer the steps for applying the 850 glaze and colors on an anterior e.max, and in most circumstances, only one firing (crystallization) is required. The strength of 850 MiYO is the glaze and the natural enamel luster accomplished with the e.max fired surface. It has been absolutely amazing for me, and it saves significant time in accomplishing incredible outcomes, often in one appointment for the patient. In all my years of teaching, I have never seen the excitement and confidence built by the attendees for hands-on training as in the
Submitted by James Klim DDS, CADStar host on 01/18/2024 - 7:09pm
Categories:
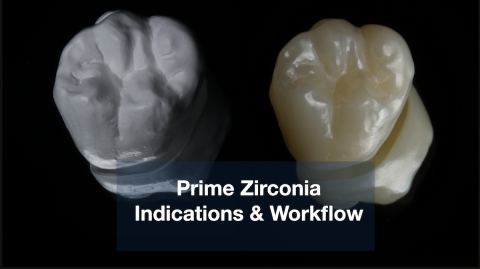
Chairside zirconia options and speed have impacted chairside more than any other material since I have worked with chairside CAD/CAM over the last 20 years. This video will review the indications for the Prime Zirconia and the finishing steps for a polished posterior restoration before sintering and after sintering. The polishing technique conveyed in this video will work for all our brands in the CEREC zirconia universe.
Submitted by James Klim DDS, CADStar host on 10/31/2023 - 8:48pm
Categories:

MiYo 850 glaze and colors are changing the industry for e.max aesthetics. This video will work through the glaze and color applications and incisal effects rivaling our historical cutback and layering applications. In addition, we can accomplish the beautiful glaze and color effect with just one firing by applying MiYo 850 before crystalization.
Submitted by James Klim DDS, CADStar host on 09/01/2023 - 5:42pm
Categories:

This video is my typical veneer bonding workflow. Though I now use Variolink Esthetic Dual Cure for easy cleanup, the light cure Variolink Esthetic is used in this video. This video is a bit long. Let me know how these longer videos work for you.
Submitted by James Klim DDS, CADStar host on 05/29/2023 - 5:51pm
Categories:
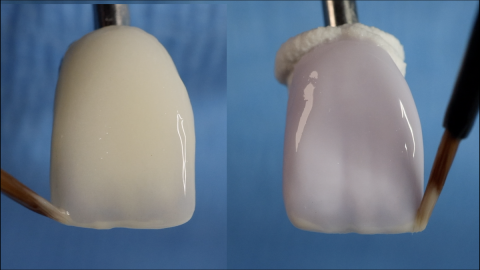
MiYO Esthetic is the magic layer to our zirconia aesthetic restorations. With this material, I can intermix and blend with adjacent e.max restorations. With the aesthetic zirconia, choose one to two shades darker than the target shade, and place MiYO Esthetic on just the buccal/labial surface. This video will demonstrate using MiYO Esthetic on an anterior ZirCAD MT Multi zirconia bridge.